
Health
Understanding Chakeaw: A Comprehensive Guide to the Traditional Thai Unit of Measurement
Published
2 months agoon
By
Micheal
Introduction
In the rich tapestry of traditional Thai weights and measures, the term “Chakeaw” (sometimes spelled “Cha Kaeo” or “Chakheaw”) holds a unique place. While modern Thailand has largely adopted the metric system, traditional units like the Chakeaw continue to appear in rural markets, antique recipes, cultural contexts, and certain agricultural practices. This article provides an in-depth exploration of the Chakeaw, its historical significance, conversion formulas, practical applications, and answers to frequently asked questions.
Whether you are a historian, a chef working with traditional Thai recipes, a farmer, or simply curious about Southeast Asian measurement systems, this guide will help you understand what a Chakeaw is, how to calculate it, and why it still matters today.
What Is a Chakeaw?
The Chakeaw is a traditional Thai unit of volume primarily used for measuring dry goods such as rice, grains, beans, and certain spices. Unlike the metric system (liters, milliliters) or the imperial system (cups, pints), the Chakeaw belongs to a localized system that evolved from practical needs in pre-industrial Siam (modern-day Thailand).
In the traditional Thai measurement hierarchy, the Chakeaw is a sub-unit of the Thang (ถัง). For reference:
- 1 Thang = 20 liters (approximate modern equivalent)
- 1 Thang = 8 Satt (สัด)
- 1 Satt = 4 Chakeaw (ชะแก้ว)
Thus, the Chakeaw represents 1/4 of a Satt and 1/32 of a Thang. Using approximate modern conversions:
- 1 Chakeaw ≈ 0.15625 liters ≈ 156.25 milliliters ≈ 0.66 US cups
This makes the Chakeaw roughly equivalent to a small teacup or a little over half a standard measuring cup. However, exact conversions vary depending on the commodity being measured (e.g., packed rice vs. loose beans) and regional differences.
Historical Context
The Chakeaw and related units originated in the Sukhothai and Ayutthaya periods (13th–18th centuries) when standardized measurements were essential for taxation, trade, and daily life. Rice was the most important commodity, and taxes were often collected in units of Thang, Satt, and Chakeaw.
The name “Chakeaw” is believed to derive from the word “chak” (ชัก) meaning “to pull” and “kaew” (แก้ว) meaning “glass” or “crystal,” possibly referring to a clear, cylindrical measuring vessel. Over time, royal decrees standardized these units, but variations persisted across different regions of Thailand—from the northern Lanna kingdoms to the southern Malay-influenced provinces.
Even after King Rama V (Chulalongkorn) promoted the metric system in the late 19th century, rural communities continued using Chakeaw for rice measurement because the units aligned naturally with traditional baskets and containers. Today, you can still encounter Chakeaw in antique markets, old cookbooks, and certain indigenous communities.
Why Calculations Are Important
Understanding Chakeaw calculations is crucial for several reasons:
- Recipe Conversion – Traditional Thai desserts (e.g., Khao Niew Mamuang, Thong Yip) sometimes list ingredients in Chakeaw.
- Historical Research – Scholars translating old documents need precise conversions.
- Rural Trade – Some farmers still sell rice by the Chakeaw in local markets.
- Cultural Preservation – Accurate knowledge helps maintain Thai heritage.
Calculation Title: Converting Chakeaw to Modern Units – A Step-by-Step Guide
Step 1: Determine Your Base Commodity
The conversion from Chakeaw to milliliters or grams depends on the density of the substance. For water-like density (e.g., milk, oil), 1 Chakeaw ≈ 156.25 ml. For dry goods:
| Commodity | Approximate weight per Chakeaw (grams) |
|---|---|
| White rice (uncooked) | 130–140 g |
| Glutinous rice | 145–155 g |
| Mung beans | 150–160 g |
| Sugar (granulated) | 120–130 g |
| Salt | 180–190 g |
Step 2: Use the Basic Formula
Volume in liters = Number of Chakeaw × 0.15625
Example: You have 5 Chakeaw of rice.
5 × 0.15625 = 0.78125 liters ≈ 781 ml
Step 3: Convert to Weight
Weight (g) = Volume (ml) × Density (g/ml)
For white rice (density ≈ 0.85 g/ml):
781 ml × 0.85 = 664 grams
Alternatively, use the table above directly: 5 Chakeaw × 135 g (average) = 675 g
Step 4: Practical Formula for Recipes
If you need to convert a Thai recipe using Chakeaw to cups or grams:
Cups (US) = Chakeaw × 0.66
Grams (rice) = Chakeaw × 135
Example: 3 Chakeaw of glutinous rice → 3 × 0.66 = 1.98 cups; 3 × 145 = 435 grams.
Step 5: Reverse Calculation
To convert liters to Chakeaw:
Chakeaw = Liters ÷ 0.15625
Example: 1 liter of water = 1 ÷ 0.15625 = 6.4 Chakeaw.
Practical Applications
In the Kitchen
Traditional Thai desserts like Khao Lam (sticky rice in bamboo) or Bua Loi (rice flour dumplings) may call for “½ Chakeaw of coconut milk” or “2 Chakeaw of rice flour.” If you lack a Chakeaw measuring vessel, use 156 ml per unit.
In Agriculture
Small-scale rice farmers in Isaan (northeastern Thailand) sometimes still use bamboo containers calibrated to 1 Chakeaw. When they say “ten Chakeaw per basket,” they mean approximately 1.56 liters.
In Antique Collecting
Authentic Chakeaw measuring vessels (often made of coconut shell, bamboo, or brass) are collectibles. Knowing the unit helps verify their original capacity.
(FAQs)
Q1: Is 1 Chakeaw exactly 156.25 milliliters?
A: No. The 156.25 ml figure is a modern approximation based on the official conversion of 1 Thang = 20 liters. In practice, local Chakeaw vessels varied from 140 ml to 170 ml depending on the region and era. For historical accuracy, always check the source.
Q2: How is Chakeaw different from a “cup”?
A: A standard US cup is 240 ml. One Chakeaw is about 65% of a cup (156 ml). A Thai “cup” (ถ้วย) used in modern cooking is often 200 ml, making 1 Chakeaw ≈ 0.78 Thai cup.
Q3: Can I use Chakeaw for liquids?
A: Yes, but traditionally it was used for dry goods. For liquids, the unit “Can” (แกน – approximately 1 liter) or “Litre” (ลิตร) is more common. However, old recipes may use Chakeaw for coconut milk or honey.
Q4: Are Chakeaw still legally recognized in Thailand?
A: No. The Thai Weights and Measures Act of 1999 (revised) mandates the metric system for all commercial transactions. However, traditional units may be used informally in rural markets or for cultural purposes.
Q5: How do I measure 1 Chakeaw without a traditional vessel?
A: Use a metric measuring cup or a kitchen scale. Fill a 150 ml measure to the brim – that will be very close. Alternatively, use a standard shot glass (44 ml) – 3.5 shot glasses equal ~1 Chakeaw. For dry rice, weigh 135 grams.
Q6: What is the relationship between Chakeaw and Baht (the currency/weight)?
A: Unrelated. “Baht” as a weight is 15.244 grams (used for gold and precious metals). Chakeaw is a volume measure for grains. They are not convertible without density data.
Q7: Why does my grandmother’s Chakeaw seem larger than 156 ml?
A: Heirloom measuring vessels often predate standardization. Some regional variants used a Thang of only 16 liters, making a Chakeaw = 125 ml. Others used a Thang of 24 liters, making a Chakeaw = 187.5 ml. Always calibrate your specific vessel by filling it with water and measuring the water volume.
Q8: How many Chakeaw are in a Satt? In a Thang?
A: 1 Satt = 4 Chakeaw. 1 Thang = 8 Satt = 32 Chakeaw.
Q9: Can I buy a Chakeaw measuring tool today?
A: Yes, from antique dealers, some Thai craft markets (e.g., Chatuchak weekend market in Bangkok), or online via platforms like Etsy (search “Thai traditional measuring cup”). Some modern kitchenware stores also produce replica sets for cultural cooking.
Q10: Is Chakeaw used in neighboring countries like Laos or Cambodia?
A: Similar units exist – e.g., the Lao “Khao” or Cambodian “Thang” – but the exact names and capacities differ. In Laos, a “Chakeaw” might refer to a completely different measure, so always verify locally.
Q11: How do I calculate Chakeaw for irregular shaped containers?
A: Fill the container with water to the brim, pour the water into a metric measuring jug, read the milliliters, then divide by 156.25. That gives you the container’s capacity in Chakeaw.
Q12: What about Chakeaw in herbal medicine?
A: Traditional Thai medicine (TTM) manuscripts sometimes use Chakeaw for powdered herbs. Because herb densities vary widely (e.g., light dried leaves vs. heavy roots), TTM practitioners often rely on the actual Chakeaw vessel rather than weight conversion.
Advanced Calculations and Practical Examples
Example 1: Scaling a Recipe
A traditional dessert recipe calls for:
- 2 Chakeaw rice flour
- 1 Chakeaw coconut milk
- 0.5 Chakeaw sugar
Convert to metric:
Rice flour: 2 × 156.25 = 312.5 ml (or ~260 grams, assuming density 0.83 g/ml)
Coconut milk: 1 × 156.25 = 156 ml
Sugar: 0.5 × 156.25 = 78 ml → weight ≈ 98 grams (density 1.26 g/ml)
Example 2: Historical Tax Record
An 1850 document states a farmer paid 120 Chakeaw of rice in tax.
120 × 0.15625 = 18.75 liters of rice. Using density 0.85 g/ml, weight = 18,750 ml × 0.85 = 15,937.5 g ≈ 15.9 kg. That’s a moderate annual tax for a small family farm.
Example 3: Converting a Modern Metric Recipe to Chakeaw
You want to make 500 ml of a rice pudding. How many Chakeaw?
500 ÷ 156.25 = 3.2 Chakeaw. Use 3 Chakeaw plus a splash (0.2 × 156.25 = 31 ml).
The Future of Chakeaw
As Thailand continues to modernize, purely traditional units like the Chakeaw face extinction. However, cultural revival movements, farm-to-table tourism, and heritage cooking classes are keeping the term alive. Digital calculators and smartphone apps now include traditional Thai units, making conversions easier than ever. For anyone passionate about Thai culture, understanding the Chakeaw is a small but meaningful way to connect with the past.
Conclusion
The Chakeaw is far more than an obsolete measurement – it is a window into Thailand’s agrarian history, culinary traditions, and community life. While you may never need to use it in a laboratory or a modern supermarket, knowing how to calculate and convert Chakeaw to liters, cups, and grams enriches your appreciation of Thai heritage. Whether you are deciphering a great-grandmother’s recipe, visiting a rural market, or simply satisfying your curiosity, this guide gives you the tools to work confidently with this fascinating unit.
You may like
Health
Ganga Hospital: Excellence in Healthcare and Patient Care
Published
4 weeks agoon
June 25, 2026By
Raju Patel
Introduction:
Every 30 seconds, someone in India needs emergency trauma care. Finding a hospital that can truly handle that pressure — with skill, speed, and heart — is not easy. Ganga Hospital in Coimbatore, Tamil Nadu, has been doing exactly that for decades. It stands as one of India’s most respected hospitals, known for complex surgeries, excellent doctors, and care that puts patients first.
What makes Ganga Hospital different from other hospitals? It is not just the equipment or the building. It is the culture of doing things right. From the moment a patient walks through the door, the focus is on getting the best possible outcome. This article will walk you through everything you need to know about Ganga Hospital — its history, specialties, achievements, and why so many people travel from across India and beyond to receive treatment there.
The Story Behind Ganga Hospital
Ganga Hospital was founded by Dr. S. Raja Sabapathy, a name that carries enormous weight in the medical world. He is a pioneering reconstructive microsurgeon who has earned recognition at both national and international levels. His goal was simple but bold — create a hospital in South India that could match the quality of the best medical centers in the world.
The hospital started with a focus on orthopedics, trauma care, and reconstructive surgery. Over time, it grew into a multi-specialty hospital that handles hundreds of complex cases every year. The foundation was built on a belief that every patient, regardless of their background, deserves expert medical care delivered with dignity and respect.
Today, Ganga Hospital is not just a building. It is a symbol of what Indian healthcare can be when driven by commitment and passion. Thousands of patients have walked out healthier because of the work done within its walls.
Location and Accessibility
Ganga Hospital is located in Coimbatore, one of Tamil Nadu’s major cities. Coimbatore is well connected by air, rail, and road. This makes it easy for patients coming from other states or even from other countries to reach the hospital without too much trouble.
The hospital has its main campus in Mettupalayam Road, Coimbatore. It is a large facility with multiple departments, operation theaters, intensive care units, and recovery wards. The infrastructure is designed to handle a high volume of patients while still maintaining quality care. Whether you are coming for an emergency or a planned procedure, the location is convenient and the hospital is easy to access.
Medical Specialties That Set Ganga Hospital Apart
Ganga Hospital covers a wide range of medical specialties. Each department is led by experienced doctors who have trained at some of the best institutions in India and abroad. Here is what makes each department stand out.
Orthopedics and Trauma Care
This is where Ganga Hospital built its reputation. The orthopedic department handles everything from simple fractures to the most complex bone and joint problems. The trauma care unit operates around the clock, ready to receive accident victims and emergency cases at any time of the day or night.
The hospital has a dedicated trauma center that follows international standards. It is equipped with advanced imaging tools, emergency operation theaters, and a highly trained team of surgeons and nurses. Patients with severe injuries get immediate attention, which often makes the difference between a full recovery and long-term disability.
Spine Surgery
Ganga Hospital is widely recognized as one of the best centers for spine surgery in India. The spine unit handles conditions like herniated discs, spinal deformities, spinal cord injuries, and tumors affecting the spine. Surgeons here use minimally invasive techniques whenever possible, which means smaller cuts, less pain, and faster recovery for patients.
People come to Ganga Hospital from all over India and from countries like Sri Lanka, Bangladesh, and the Middle East for spine treatment. The success rates are high and the complication rates are low, which is a direct result of the team’s experience and the hospital’s strict protocols.
Reconstructive and Plastic Surgery
The reconstructive surgery department at Ganga Hospital is world-class. Dr. Raja Sabapathy himself has performed thousands of complex reconstructive procedures. The department specializes in limb replantation, hand surgery, and microsurgery. These are procedures that require extreme precision and many years of training to perform well.
Burn care and rehabilitation are also handled here. Patients who have suffered severe burns receive comprehensive treatment that includes skin grafting, scar management, and emotional support. The team understands that recovery from burns is not just physical — it is psychological too.
Neurology and Neurosurgery
The neuroscience department at Ganga Hospital handles brain and spinal cord conditions with a high level of expertise. Stroke management, brain tumor surgery, epilepsy treatment, and spinal cord injury rehabilitation are all done here. The neurosurgery team uses advanced tools like neuro-navigation and intraoperative monitoring to improve surgical precision.
Early intervention in neurological cases is critical. The hospital’s emergency protocols make sure that stroke patients receive treatment within the golden hour window, which greatly reduces the risk of permanent brain damage.
Hand Surgery and Microsurgery
Ganga Hospital is internationally recognized for hand surgery and microsurgery. The department has performed some of the most technically demanding surgeries in India, including full hand replantations after traumatic amputations. This work requires not just skill but also a full support team including trained nurses, anesthesiologists, and rehabilitation therapists.
The outcomes from these surgeries have been published in international medical journals. Ganga Hospital has contributed significantly to the global body of knowledge in this field.
The Doctors: Experts Who Truly Care
A hospital is only as good as the people who work there. Ganga Hospital has assembled a team of highly qualified doctors who are not just technically skilled but also genuinely caring. Many of the senior doctors have trained abroad, bringing back global best practices and applying them in an Indian context.
The hospital also trains future doctors through its fellowship and residency programs. Young surgeons come here to learn from some of the best in the field. This culture of teaching keeps the hospital sharp and updated with the latest advances in medicine.
Patients consistently report that the doctors at Ganga Hospital take time to explain their condition and treatment options clearly. This is not always common in busy hospitals, which makes it a standout quality at Ganga.
Technology and Infrastructure
Modern healthcare depends heavily on technology. Ganga Hospital has invested in advanced medical technology across its departments. This includes high-resolution MRI and CT scanners, advanced laparoscopic equipment, robotic surgical assistance tools, and state-of-the-art operation theaters.
The intensive care units are equipped with the latest monitoring systems. Patients in critical condition are closely watched by both the technology and the staff. This dual layer of attention improves safety and helps catch problems before they become serious.
The hospital’s labs offer a wide range of diagnostic tests with fast turnaround times. Accurate diagnosis is the first step in effective treatment, and Ganga Hospital takes this seriously.
Patient Care: More Than Just Medicine
One of the most talked-about aspects of Ganga Hospital is its approach to patient care. The staff is trained to treat patients with respect and kindness. Long waiting times, dismissive attitudes, and poor communication are things that many hospitals struggle with. Ganga Hospital has worked hard to address these issues.
The nursing staff plays a huge role in patient recovery. At Ganga Hospital, nurses are well trained and empathetic. They monitor patients closely, provide comfort during difficult times, and communicate clearly with the patient’s family. Good nursing care can significantly speed up recovery and reduce complications.
The hospital also has a patient support team that helps families from out of town with accommodation guidance, translation services for non-Tamil speakers, and general navigation of the hospital system. This makes a big difference for people who are already stressed about a medical condition.
International Patients: A Destination for Global Healthcare
Ganga Hospital receives patients from many countries every year. This includes patients from Sri Lanka, the Maldives, Bangladesh, Singapore, and several African and Middle Eastern nations. The hospital has specific support services for international patients, including visa assistance guidance, multi-language communication, and dedicated international patient coordinators.
The cost of treatment at Ganga Hospital is significantly lower than in Western countries, while the quality of care is comparable. This is a major reason why medical tourism to Ganga Hospital continues to grow. A spine surgery that might cost tens of thousands of dollars in the United States can be done at Ganga Hospital for a fraction of that price, with equally good or better outcomes.
International accreditation and recognition also add to the hospital’s credibility. The quality systems in place at Ganga Hospital meet or exceed international healthcare standards.
Research and Academics: Pushing Medicine Forward
Ganga Hospital is not just a place where patients get treated. It is also a place where medicine advances. The hospital has an active research program, and its doctors regularly publish findings in reputed international journals. This research covers areas like reconstructive surgery outcomes, trauma care protocols, and new surgical techniques.
The hospital is affiliated with academic institutions and runs training programs for doctors at various stages of their careers. This focus on education means that the next generation of surgeons will carry forward the high standards that Ganga Hospital has built.
Research at Ganga Hospital also feeds directly into clinical practice. When a new and better way of doing something is discovered, it gets implemented quickly. Patients benefit from these advances in real time.
Why Patients Choose Ganga Hospital
| Reason | What It Means for Patients |
|---|---|
| Expert Surgeons | Decades of experience in complex procedures |
| Advanced Technology | Better diagnosis and surgical precision |
| Affordable Costs | High quality care without huge financial burden |
| Comprehensive Care | Everything from emergency to rehabilitation under one roof |
| Reputation | Proven track record with thousands of successful cases |
Patients choose Ganga Hospital because it delivers results. The hospital has built its reputation not through marketing campaigns but through real outcomes. Word of mouth from satisfied patients is one of the strongest indicators of a hospital’s quality, and Ganga Hospital has earned that trust over many years.
Rehabilitation Services: Recovery Done Right
Treatment does not end when the surgery is over. Recovery and rehabilitation are just as important as the procedure itself. Ganga Hospital has a dedicated rehabilitation center that helps patients regain strength, mobility, and independence after surgery or injury.
Physiotherapists, occupational therapists, and speech therapists work together with the medical team to create recovery plans that are specific to each patient’s condition and goals. The rehabilitation center is equipped with modern tools to assist in physical recovery, and the therapists are trained to provide both encouragement and guidance throughout the process.
For patients recovering from limb replantation, spinal surgery, or brain injuries, the rehabilitation phase can last weeks or even months. Ganga Hospital provides continuous support throughout this period, making sure that patients do not feel abandoned after their procedure.
Affordability: Quality Care That Does Not Break the Bank
One of the biggest concerns for patients in India is the cost of medical treatment. Ganga Hospital understands this and has structured its pricing to be transparent and fair. The hospital offers package rates for many procedures, which makes it easier for patients to plan financially.
For patients who cannot afford the full cost of treatment, the hospital has systems in place to assess individual situations and provide appropriate support. The goal is to make sure that financial hardship does not prevent someone from getting the care they need. This commitment to accessibility reflects the values on which the hospital was founded.
Many patients from rural areas and smaller towns come to Ganga Hospital because they know they will be treated fairly, both medically and financially. This trust is something the hospital guards very carefully.
What Families Can Expect
A hospital visit is stressful not just for the patient but for the whole family. Ganga Hospital pays attention to this reality. Waiting areas are clean and comfortable. Communication from doctors to family members is clear and regular. The staff is approachable and helpful when family members have questions or concerns.
For surgeries that take several hours, family members are given regular updates. This reduces anxiety and helps families feel included in the care process. When patients come from far away, the hospital helps connect families with nearby accommodation options.
The attention given to families reflects a broader understanding at Ganga Hospital — that healing happens better when the environment around the patient is supportive and calm.
Infection Control and Safety Standards
Patient safety is a top priority at Ganga Hospital. The hospital follows strict infection control protocols across all its departments. Operation theaters are maintained to the highest hygiene standards. Hand hygiene compliance is monitored regularly. Equipment sterilization follows international guidelines.
These might sound like basic things, but infection control is actually one of the biggest challenges in hospital management. Hospital-acquired infections can be life-threatening, especially for patients who are already weak. Ganga Hospital’s commitment to this area has resulted in low rates of such infections, which is a sign of serious operational discipline.
Community Outreach: Giving Back to Society
Ganga Hospital is deeply committed to the communities it serves. The hospital organizes regular health camps in rural areas, providing free screenings and basic medical consultations to people who otherwise have little access to healthcare. These camps cover areas like orthopedic health, eye care, and general wellness.
The hospital also runs educational programs for the public on topics like road safety, first aid, and the importance of early medical intervention. By educating communities, Ganga Hospital helps prevent injuries and illnesses before they require hospital treatment. This preventive approach reflects a mature and responsible healthcare philosophy.
Medical professionals from Ganga Hospital also volunteer their time for training programs at district hospitals and community health centers. This spreads knowledge and improves healthcare quality at a broader level.
Awards and Recognition
Ganga Hospital has received numerous awards and recognitions over the years. These awards come from reputable medical organizations and government bodies that evaluate hospitals on criteria like surgical outcomes, patient safety, innovation, and community service.
Dr. Raja Sabapathy has personally received awards like the Padma Shri, one of India’s highest civilian honors. This recognition reflects not just his personal achievement but the collective effort of everyone at Ganga Hospital who works every day to deliver exceptional care.
These awards matter because they are based on measurable outcomes. They confirm that Ganga Hospital is performing at a high level by objective standards, not just by self-assessment.
Challenges and How Ganga Hospital Handles Them
No hospital is without challenges. High patient volumes, complex cases, and the pressure of dealing with critical emergencies put enormous stress on any healthcare system. Ganga Hospital manages these challenges through strong teamwork, clear protocols, and ongoing training.
Staff burnout is a real issue in high-pressure medical environments. The hospital addresses this through staff wellness programs, regular breaks, and a culture that values every team member’s contribution. Happy, healthy staff members provide better care to patients, and Ganga Hospital knows this.
Managing expectations is another challenge. Patients sometimes come with unrealistic hopes about what surgery or treatment can achieve. The doctors at Ganga Hospital are honest with patients from the beginning, explaining what is possible and what is not. This honesty builds trust even when the news is not what the patient hoped for.
The Future of Ganga Hospital
Ganga Hospital continues to grow and invest in its future. New departments, expanded facilities, and advanced technology are part of the hospital’s growth plan. The leadership is also focused on digital health integration, which means patients will have better access to their records, consultations, and follow-up care through digital platforms.
Research programs will continue to expand, with more international collaborations and clinical trials expected in the coming years. The hospital’s training programs will also grow, producing more skilled surgeons who will go on to serve patients across India and beyond.
The values that guided Ganga Hospital from its early days — commitment to excellence, compassion for patients, and a drive to push medical boundaries — will continue to define its future.
Conclusion: A Hospital You Can Trust With Your Life
Ganga Hospital is not just one of the best hospitals in India. It is a place where people go when they need real help with serious medical problems. From trauma care and spine surgery to reconstructive microsurgery and rehabilitation, the hospital delivers results that speak for themselves.
The combination of expert doctors, advanced technology, compassionate care, and fair pricing makes Ganga Hospital a truly exceptional healthcare destination. Whether you are a patient in Coimbatore, someone traveling from another state, or an international patient looking for affordable and high-quality care, Ganga Hospital has the infrastructure and the expertise to meet your needs.
If you or someone you love needs expert medical care, do not wait. Contact Ganga Hospital today to schedule a consultation or learn more about the services available. Your health is too important to leave to chance — choose a hospital that has proven, year after year, that it can be trusted.
Health
Pravi Celer Explained: The Ultimate Guide to Its Benefits and Uses
Published
1 month agoon
June 18, 2026By
Raju Patel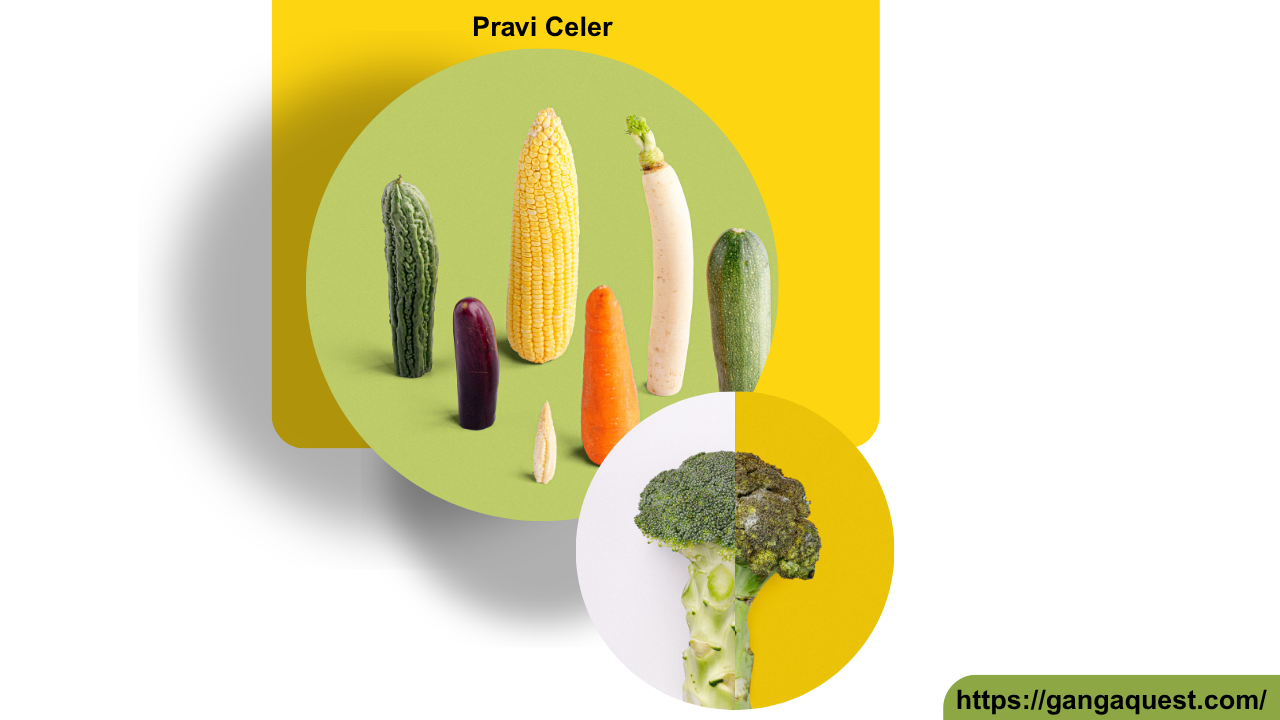
Introduction:
Why Pravi Celer Matters for Better Health
A healthy diet often starts with simple foods, and Pravi Celer is one of those natural choices that can bring many benefits. Studies show that vegetables rich in water, fiber, vitamins, and plant compounds can support better overall health when added to daily meals. Pravi Celer is valued because it is low in calories while offering useful nutrients.
Many people add Pravi Celer to their meals because of its fresh taste and easy use. It can be eaten raw, cooked, blended into drinks, or added to recipes. This makes it a simple option for people who want healthier food habits without making big changes.
Pravi Celer has gained attention because it combines nutrition and flexibility. From supporting digestion to adding flavor to meals, this green vegetable has a place in many kitchens. This guide explains what Pravi Celer is, its benefits, and the best ways to use it.
What Is Pravi Celer?
Pravi Celer refers to a type of celery that is known for its fresh green stalks and strong natural flavor. It belongs to the celery family and has been used for food and traditional health practices for many years.
The plant usually grows in cool climates and develops long stalks with leafy tops. Both the stalks and leaves can be used in cooking. Some people enjoy it fresh because of its crisp texture, while others prefer it in soups, salads, and drinks.
Pravi Celer contains water, fiber, vitamins, and minerals that make it a useful addition to a balanced diet. Its mild taste allows it to mix well with many other foods.
Pravi Celer Benefits for Daily Wellness
One of the main reasons people choose Pravi Celer is its nutrition profile. It provides important nutrients without adding many calories. This makes it a good choice for people who want to eat lighter meals.
Pravi Celer contains antioxidants that help protect cells from damage caused by harmful molecules. A diet with different sources of antioxidants may help the body maintain normal function.
Another benefit of Pravi Celer is its fiber content. Fiber helps support healthy digestion and can help people feel full after meals. Adding fiber rich foods to a daily routine may support better eating habits.
Pravi Celer also contains minerals such as potassium. Potassium plays a role in normal body functions, including muscle movement and fluid balance.
Nutritional Value of Pravi Celer
The value of Pravi Celer comes from its combination of water, fiber, and natural nutrients. It is mostly made of water, which helps make it a refreshing food choice.
A typical serving of Pravi Celer may provide:
| Nutrient | Benefit |
|---|---|
| Fiber | Supports digestion and fullness |
| Water | Helps maintain hydration |
| Potassium | Supports normal body functions |
| Vitamins | Help support general health |
The exact nutrition amount can change depending on the plant type, growing conditions, and serving size. Still, Pravi Celer remains a popular vegetable for people who want more natural foods in their meals.
How Pravi Celer Supports Digestion
Good digestion depends on many factors, including enough fiber and fluids in the diet. Pravi Celer can support digestion because it contains fiber that helps food move through the digestive system.
The water content in Pravi Celer also adds to its refreshing quality. Eating vegetables with high water content can help people maintain better hydration habits.
Some people enjoy Pravi Celer juice in the morning because it feels light and fresh. However, whole celery may provide more fiber compared with strained drinks.
Using Pravi Celer in Everyday Meals
Pravi Celer is easy to add to daily recipes. Its fresh flavor works well with many foods, making it a useful ingredient for beginners and experienced cooks.
You can chop Pravi Celer into salads for extra crunch or add it to soups for more flavor. The leaves can also be used as a seasoning because they contain a strong herbal taste.
Many people blend Pravi Celer with fruits and other vegetables to create fresh drinks. It can also be paired with healthy snacks such as hummus or nut based spreads.
Pravi Celer for Healthy Lifestyle Choices
A balanced lifestyle does not require complicated plans. Small food choices can make a difference over time. Adding Pravi Celer to meals is one simple way to increase vegetable intake and bring more natural nutrients into a daily routine.
Many people choose Pravi Celer because it fits different eating styles. It can be part of a light meal, a healthy snack, or a fresh drink. Its simple nature makes it useful for families, athletes, and anyone trying to improve food habits.
The best results come from using Pravi Celer as part of a varied diet. It works well with fruits, vegetables, grains, and protein sources. A single food cannot solve every health concern, but smart choices can support overall wellness.
Pravi Celer and Hydration Support
Staying hydrated is important for normal body functions. Since Pravi Celer contains a high amount of water, it can be a helpful food choice for people who want more fluids through meals.
Eating water rich foods can make daily meals feel fresher. This is especially useful during warm weather when the body loses more fluids.
Pravi Celer is not a replacement for drinking water, but it can support a healthy hydration routine. Adding it to salads, soups, or juices is an easy way to enjoy its fresh qualities.
The Role of Antioxidants in Pravi Celer
Pravi Celer contains plant compounds that act as antioxidants. These natural substances help protect the body from stress caused by unstable molecules.
A diet that includes different vegetables provides a range of helpful plant compounds. Pravi Celer can be one part of that mix.
The antioxidant content of vegetables may support general wellness when combined with healthy habits. Eating a variety of colorful foods is often a good approach for long term nutrition.
Pravi Celer Uses in Cooking
The uses of Pravi Celer go beyond simple salads. It has become a common ingredient in many types of dishes because of its flavor and texture.
Fresh stalks can be sliced and mixed into salads. They add a crisp bite and a fresh taste that works well with many ingredients.
Cooked Pravi Celer can bring depth to soups, stews, and sauces. When heated, it becomes softer while keeping much of its natural flavor.
Some popular uses include:
• Adding chopped Pravi Celer to vegetable soups
• Mixing it with fresh salads
• Blending it into vegetable drinks
• Using the leaves as a natural seasoning
Pravi Celer Juice: What People Should Know
Pravi Celer juice has become popular among people who enjoy fresh vegetable drinks. Many people drink it because it feels refreshing and easy to include in a morning routine.
When making Pravi Celer juice, fresh stalks are usually washed and blended or pressed. Some people mix it with other ingredients to improve the taste.
It is important to remember that juice may contain less fiber than whole vegetables. Eating whole Pravi Celer can provide more of the natural fiber that supports digestion.
Choosing Fresh Pravi Celer
Fresh quality matters when buying Pravi Celer. Good stalks usually look firm and have a fresh green appearance.
Avoid stalks that look weak, dry, or damaged. Fresh Pravi Celer should feel crisp when touched.
Proper storage can help keep it fresh longer. Keeping it in a cool place and protecting it from moisture loss can help maintain its texture.
Pravi Celer in Traditional Food Practices
Celer has been used in different cultures for generations. Many traditional food practices include celery because of its taste and simple nutrition.
People have used Pravi Celer in meals, drinks, and natural food preparations. Its popularity continues because it is easy to grow and easy to prepare.
Modern food choices often combine traditional ingredients with new recipes. Pravi Celer is a good example of a plant that continues to stay useful across different cooking styles.
Possible Considerations Before Eating Pravi Celer
Although Pravi Celer is safe for many people, everyone has different dietary needs. Some individuals may need to be careful with certain foods because of allergies or personal health conditions.
People who notice discomfort after eating Pravi Celer should pay attention to their body’s response. A balanced diet should always match individual needs.
Washing Pravi Celer before eating is also important. Fresh vegetables can collect dirt during growing and handling, so proper cleaning helps maintain food safety.
Pravi Celer and Weight Friendly Meals
Many people include Pravi Celer in meals because it is light and low in calories. It can add volume and texture without making meals feel heavy.
Fiber from vegetables may help people feel satisfied after eating. This can support better portion control when combined with healthy meal choices.
Pravi Celer works well in weight friendly recipes because it pairs with many foods. It can be added to meals without changing the overall taste too much.
How to Add Pravi Celer to Your Daily Routine
Adding Pravi Celer does not have to be difficult. Small steps are usually easier to maintain than major diet changes.
You can start by adding a small amount to meals you already enjoy. Over time, you may discover new recipes and ways to use it.
A simple routine might include fresh Pravi Celer with lunch, chopped pieces in dinner recipes, or a vegetable drink during the day.
Conclusion: Make Pravi Celer Part of Your Healthy Routine
Pravi Celer is a simple vegetable with many useful qualities. Its fresh taste, water content, fiber, vitamins, and plant compounds make it a valuable addition to everyday meals.
From salads to soups and drinks, Pravi Celer offers many ways to enjoy natural food choices. It supports a balanced lifestyle when combined with good eating habits and regular activity.
The best way to benefit from Pravi Celer is to use it consistently as part of a varied diet. Try adding Pravi Celer to your next meal and explore the many simple ways this green vegetable can fit into your routine.
Health
Everything You Need To Know About Invisalign Before Starting Treatment
Published
1 month agoon
June 18, 2026By
Raju Patel
Key Takeaways
- Invisalign offers a discreet, effective way to straighten teeth with clear aligners.
- It is suitable for teens and adults with mild to moderate orthodontic issues.
- Understanding the process, benefits, and limitations is crucial before starting treatment.
- Proper oral hygiene and compliance are essential for optimal results with Invisalign.
Introduction
Considering a straighter, healthier smile without the hassle of traditional braces? Invisalign might be the solution for you. This innovative orthodontic treatment uses a series of clear, removable aligners to move teeth into their ideal positions gradually. Whether you are a working professional, a student, or want to improve your confidence, Invisalign can offer a nearly invisible way to enhance your smile. To better understand if this treatment suits you, it is wise to consult a dental professional. More information is available at dentistsofhinsdalelake.com.
Before you commit to Invisalign, it is essential to know exactly how the process works, who is an ideal candidate, and what to expect throughout your treatment. Making an informed decision may help you achieve the best possible outcome and a smile you’ll love showing off.
What Is Invisalign?
Invisalign is a modern orthodontic treatment that uses clear, custom-made plastic aligners to move teeth over time gently. Unlike metal braces, Invisalign aligners are smooth, removable, and nearly invisible, offering greater flexibility and fewer disruptions to daily life. Each set of aligners is worn for 1 to 2 weeks before being replaced with the next set in the series.
Developed as an alternative to traditional braces, Invisalign is often preferred by adults and teenagers seeking a more subtle way to correct issues like crowding, spacing, overbites, and underbites. The aligners are made with advanced 3D imaging technology, ensuring a precise, snug fit tailored to your specific needs.
Who Is a Good Candidate for Invisalign?
Invisalign works best for individuals with mild to moderate orthodontic problems. This includes issues such as crooked teeth, gaps, slight bite misalignments, or teeth that have shifted after previous orthodontic work. Generally, teens and adults with fully developed teeth are the primary candidates for Invisalign. Children whose mouths are still growing are usually not recommended for this treatment.
Certain complex alignment or bite problems may still require traditional braces. Your dentist or orthodontist will evaluate your case and help determine if Invisalign will provide the best outcome for your situation. Consistent wear is key, so candidates must be committed to following all instructions and wearing aligners as directed.
How the Invisalign Process Works
Initial Consultation
The process begins with a consultation, during which a dental professional will examine your teeth, take digital scans or impressions, and discuss your health and treatment goals. This step will confirm if Invisalign is suitable for you.
Custom Treatment Plan
Using 3D imaging technology, a precise digital map of your teeth is created. This plan shows the expected movement of each tooth and projects the results so that you can visualize your future smile before treatment even begins.
Getting Your Aligners
Once your custom aligners are ready, you will receive several sets to be worn in sequence. Each set is typically worn for 20 to 22 hours per day, only removing them for eating, drinking (except water), brushing, and flossing.
Regular Progress Checks
Your dentist or orthodontist will schedule follow-up appointments every six to eight weeks to monitor progress and provide your next set of aligners.
Completion and Retention
After the series is complete, you may be given a retainer to wear at night, which helps maintain your results and keeps your teeth in their new positions.
Benefits of Invisalign
- Discreet Appearance: The clear aligners are barely visible, making treatment much less noticeable than metal braces.
- Removable Aligners: You can take them out for meals and oral hygiene, making it easier to maintain a clean mouth and eat the foods you love.
- Comfort: The smooth plastic aligners are custom-fitted, reducing the chance of irritation compared to wires and brackets.
- Fewer Office Visits: Progress checks are less frequent and often shorter, resulting in less disruption to your schedule.
For more background on the rise and technology of Invisalign, consider reading the overview on WebMD.
Limitations and Considerations
Despite its many advantages, Invisalign is not suitable for everyone. Severe alignment or skeletal issues might require traditional braces or even surgical correction. Aligners must be worn diligently for the specified amount of time each day, as failure to comply may delay results. Additionally, users need to remove aligners before eating or drinking anything other than water to prevent staining or damage.
It is important to maintain excellent oral hygiene during treatment. Food and plaque can become trapped under the aligner, increasing the risk of cavities or gum disease if teeth are not cleaned thoroughly after meals and snacks.
What Results Can You Expect?
Many patients see a noticeable improvement in their smiles within a few months. The entire process typically takes 12 to 18 months, depending on your specific case. Final results depend on the complexity of your issues and your commitment to wearing the aligners as instructed. Most individuals are satisfied with both the process and the result, enjoying a straighter, healthier smile.
Final Thoughts: Preparing for Your Smile Transformation
Choosing Invisalign is a significant step toward improving your oral health and boosting your self-esteem. Understanding what to expect at every stage, from the initial consultation to life after aligners, will help you feel confident and prepared. Routine checkups and consistent aligner use are essential for achieving the best results. Always partner with a qualified dentist or orthodontist for personalized advice and care throughout the journey. For further information on orthodontic treatment options, the WebMD resource page offers a well-rounded overview.
Trending
-
 Tech5 months ago
Remote Work: A Complete Guide to Working from Anywhere
-
 Tech6 months ago
Twizchat.com: The Future of Real-Time Online Communication
-
 Business6 months ago
FedEx: A Complete Guide to Services, Shipping Costs, and Global Logistics
-
 Tech6 months ago
Top 10 Digital Printing Companies in Chicago
-

 Ganga Quest12 months ago
Ganga Quest
-

 Ganga Updates12 months ago
Latest News, Photos, Videos on Ganga Floods
-
 Lifestyle6 months ago
Creative Grounding Techniques for Everyday Stress Relief
-

 Tech12 months ago
InternetChocks: Understanding Their Role in Online Security